
Colorful Pom Pom Popsicle Stick Stars
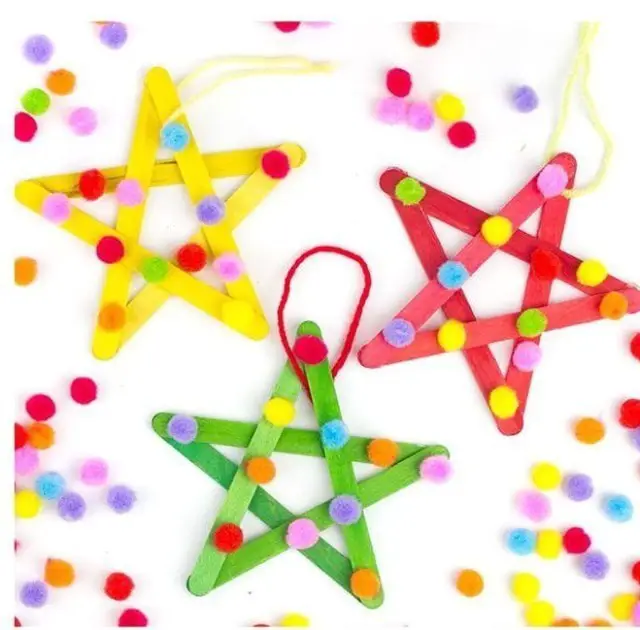
I’m always excited to incorporate colorful pom poms into Christmas crafts for kids. Not only do they add a pop of color, but they can also help bring festive cheer to any project. One of my favorite ways to use them is by creating adorable pom pom popsicle stick stars, inspired by the kidscraftroom idea. These whimsical decorations are incredibly easy to make and can be used to adorn your Christmas trees or add a personal touch to your ornaments. To get started, gather colored popsicle sticks, pom poms, glue, and some yarn. Begin by assembling the star shape using the popsicle sticks and glue. Next, tie the yarn around the pom poms and secure them with glue. For a step-by-step guide on how to bring these adorable stars to life, click here.
Bottle Lid Snowman Decorations
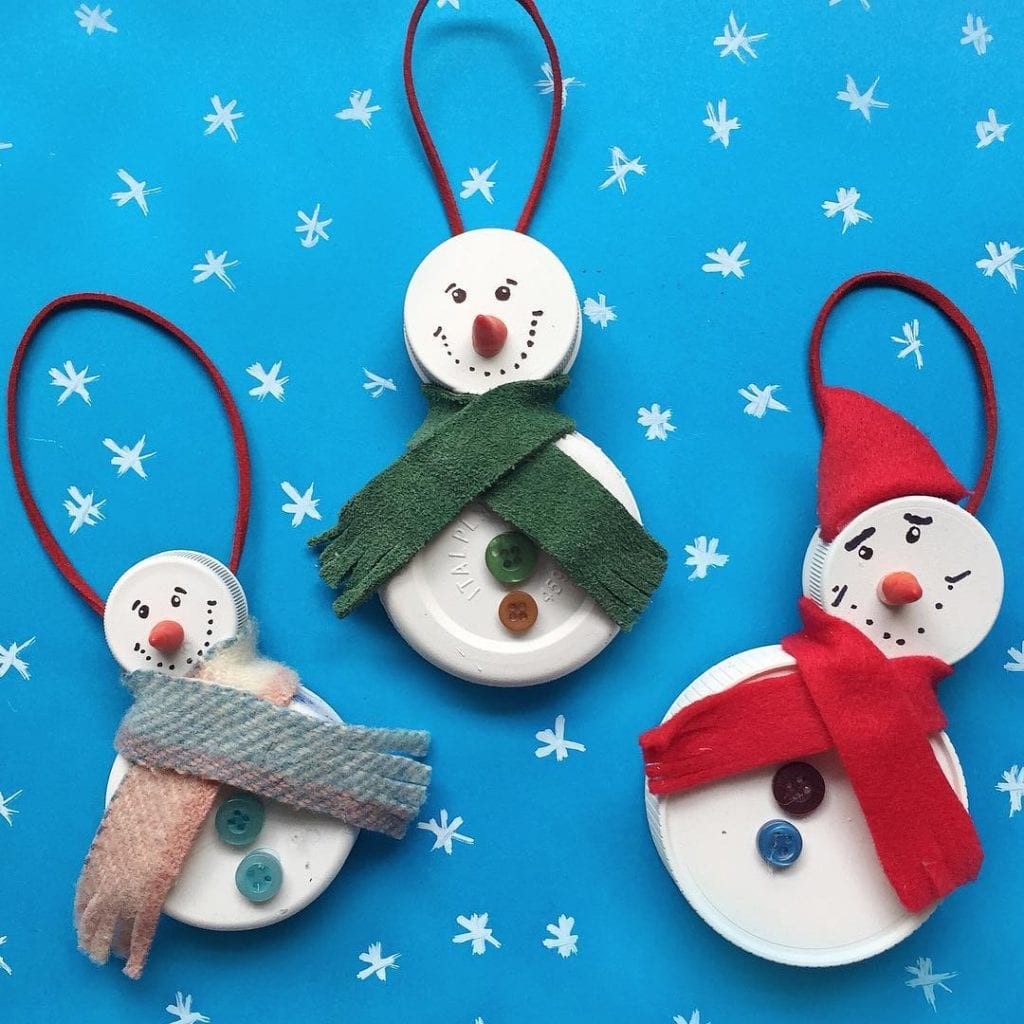
Handywithscissors’ adorable snowmen require minimal materials and can be made by children as young as six years old with some adult supervision. The crafting process is surprisingly simple, needing just a few basic supplies: small and large bottle lids, colored felt or blanket scraps, white acrylic paint or spray paint, orange oven-bake clay, sharpies, and a cord or yarn. Begin by combining the two lid pieces using glue, then give them a coat of white paint to bring out their snowy charm. Next, shape tiny carrot noses from the clay and add details with a marker. To secure the lids together, attach a piece of cord to the backside. Cut a thin strip of blanket or felt and wrap it around your snowman’s body, securing it with hot glue. Finally, add some finishing touches by sticking on a few buttons. For a step-by-step guide to making these festive friends, visit handywithscissors’ blog for inspiration.
Mini Woolen Wreathes
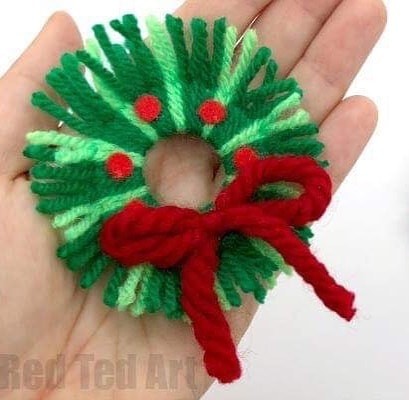
The charming mini woolen wreaths created by redtedart are perfect for adding a touch of whimsy to your holiday decor or gift-giving. Not only do they make lovely ornaments for your Christmas tree, but they can also be used as embellishments on greeting cards or gifts. Additionally, these craft projects provide an excellent way for children to develop their motor skills while having fun creating something special. To bring this delightful idea to life, you’ll need a few basic supplies: yarn or wool in your desired colors, some felt, a piece of cardboard, and a pair of scissors. For a step-by-step guide on how to create these adorable mini wreaths, visit the Easy Yarn Wreath Ornament tutorial.
Textured Cardboard Mini Christmas Trees
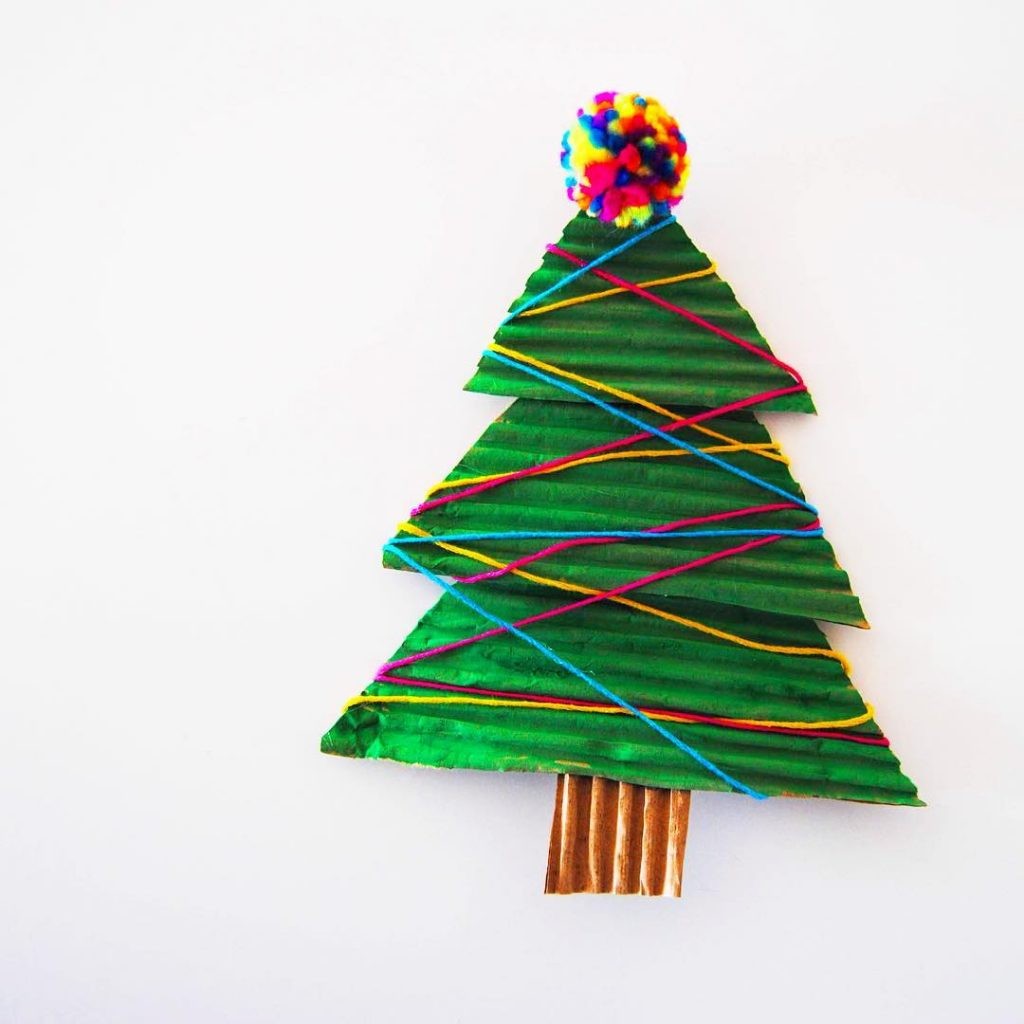
These charming mini Christmas trees by startcreativestudio are an absolute delight. What’s more, they’re surprisingly easy to craft. To get started, you’ll need a few basic materials: textured cardboard, pom poms, colored yarn, green and brown paint, scissors, and glue. Begin by cutting out three triangular shapes from the cardboard and painting them a vibrant green. Next, cut out a small trunk piece and coat it with rich brown paint. Once these elements are prepared, simply assemble them to create the foundation of your mini Christmas tree. The fun part comes next – decorate your masterpiece using colored yarn, pom poms, and any additional embellishments that strike your fancy, such as glitter, sparkles, or stars. Let your creativity shine!
Cute Sewing Tree Ornaments

Add some whimsy to your Christmas celebrations by creating mini Christmas trees to adorn your main tree. This fun and easy project is perfect for involving the kids in the holiday spirit. Simply cut out triangular shapes from cardboard scraps, punch a few holes into each one, and let the little ones get creative with yarn and needles. They can add their own special touches like spangles, stars, glitter, and pompoms to make each mini tree unique.
Shimmery Pine Cone Trees

Create a whimsical Magical Pine Cone Forest by transforming plain pine cones into sparkling trees. This easy and enjoyable DIY project makes for a fantastic Christmas decoration. To get started, you’ll need some pine cones, acrylic paints, brushes, mini wooden flower pots, extra fine white glitter, and a hot glue gun. Begin by carefully removing the bottom end of each pine cone to your desired tree length. Next, apply a small amount of hot glue to the end and attach a miniature flower pot at the base. Then, unleash your creativity with paint and glitter. For a step-by-step guide on how to bring your Magical Pine Cone Forest to life, visit the brainy_beginnings_ network’s blog.
Christmas Tree Leaf Decorations
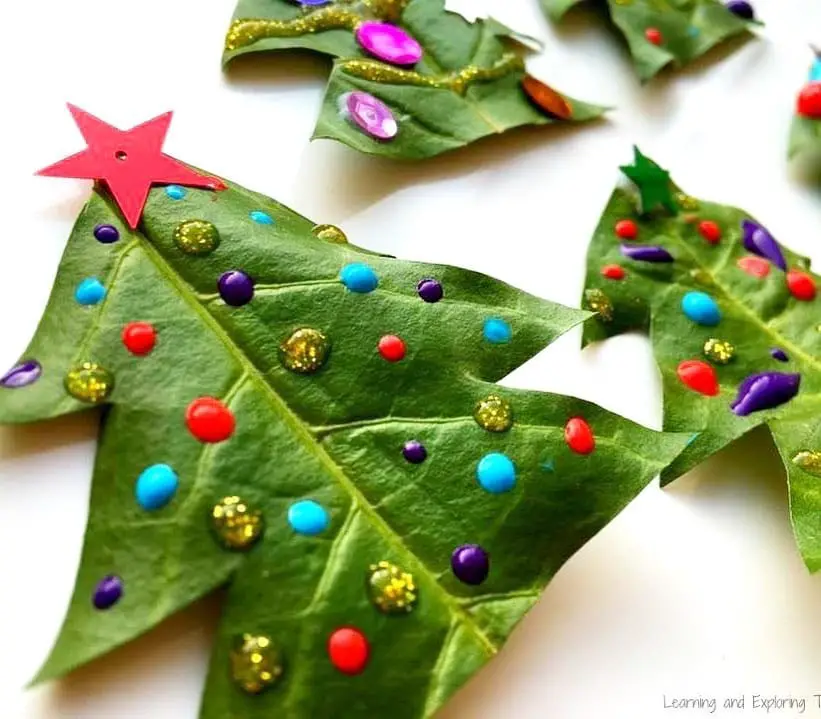
Imagine creating a Christmas tree decoration that’s as effortless as a walk through your own backyard. The concept is surprisingly straightforward: take a large leaf from your yard, shape it into a miniature Christmas tree using scissors, and then let your imagination run wild with decorations. Go ahead and add some sparkle with glitter, stars, or stickers; get creative with paint or any other embellishments that strike your fancy.
Pinecone Penguins
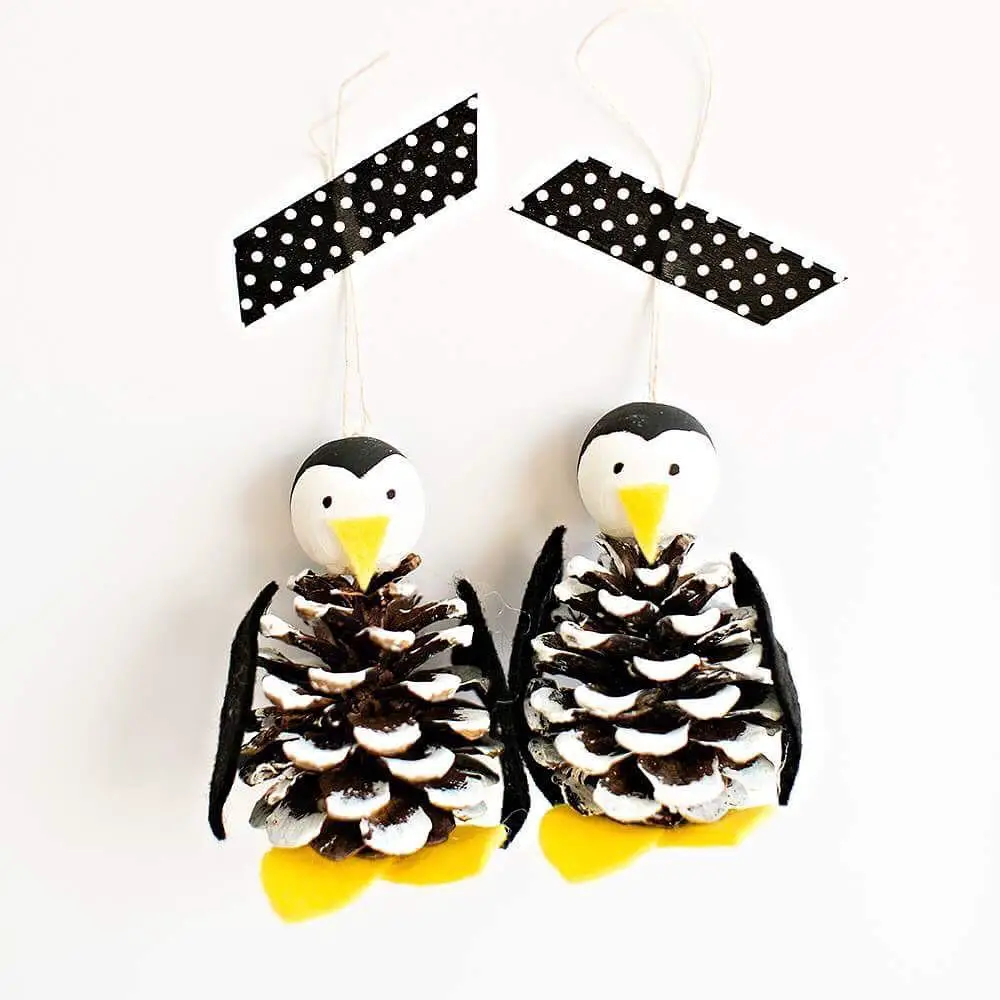
Get ready to add an adorable touch to your Christmas tree with these charming pine cone penguins from hellowonderful_co! To bring this whimsical decoration to life, gather the following materials: pine cones, black and yellow felt, black and white craft paint, a paintbrush, a pencil, 1-inch wooden beads, string or twine, and hot glue. Begin by painting the tips of the pine cone and the wooden beads white, allowing them to dry completely before moving on. Next, draw the penguin’s head onto the pine cone using a pencil and bring it to life with black paint. Cut out wing shapes from black felt and foot shapes from yellow felt, then create a small beak triangle from either material and secure it to the wooden bead using hot glue. Thread a piece of twine through your bead, tying off the end with a sturdy knot before attaching the bead to the pine cone via hot glue. And that’s it! For a detailed, step-by-step guide on how to bring these delightful penguins to your tree, visit hellowonderful_co’s website.
Cute and Easy Christmas Cards
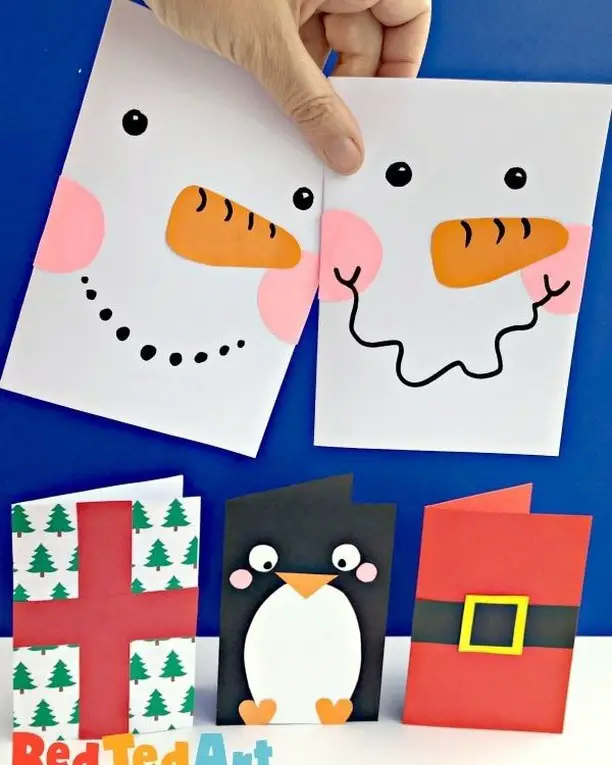
When it comes to crafting Christmas cards, one of the best things about this activity is how little preparation is required. In fact, you can simply hand over the reins to your kids and let their creativity shine. All you’ll need are some basic materials like craft papers, scissors, and a glue stick. But where the real fun begins is when you let them get creative with embellishments – think googly eyes, stickers, glitter, beads, or anything else that sparks their imagination. Not only will they have a blast making the card, but they’ll also develop their artistic skills in the process. And to make it an even more meaningful experience, encourage them to write heartfelt messages inside and exchange cards with family and friends.
Paper Cups Snowman
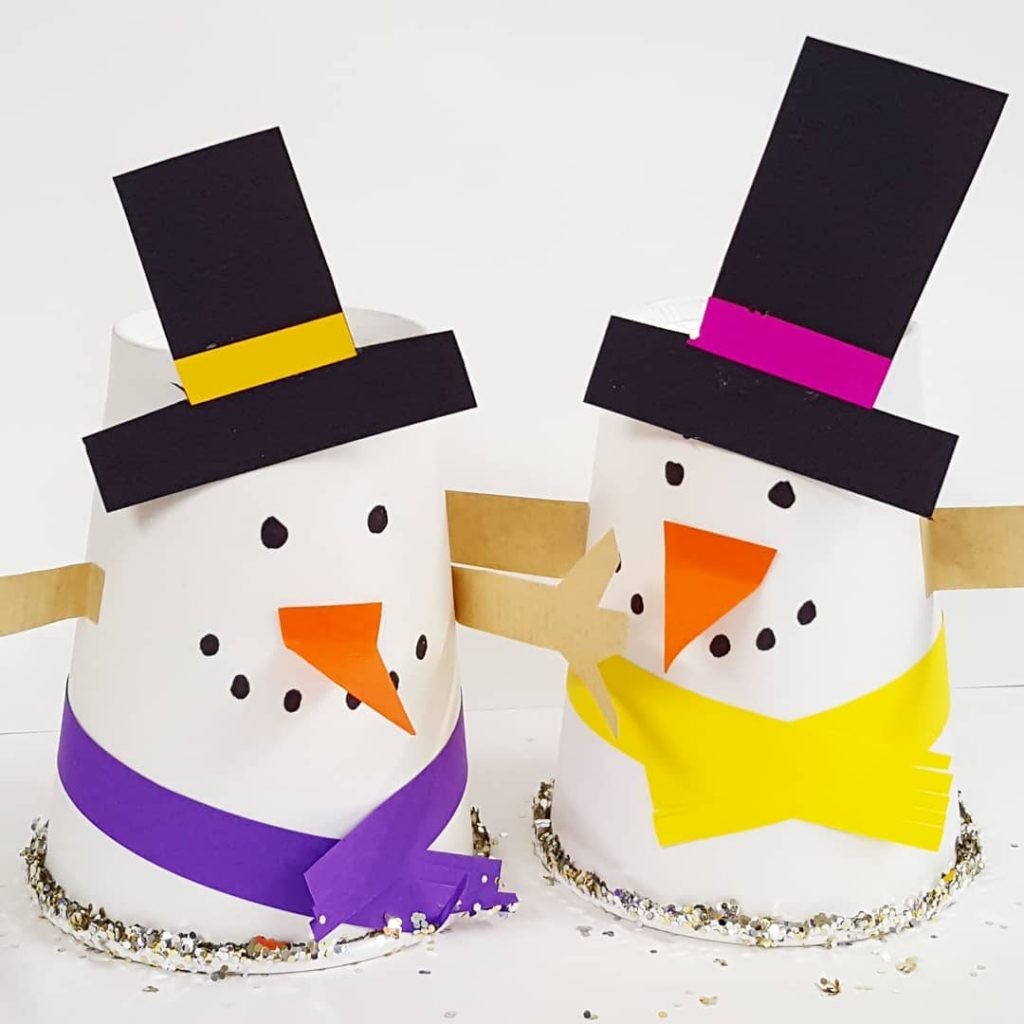
To bring some winter wonder into your home, try creating these adorable paper cup snowmen by heart_artlife. The best part? They’re incredibly easy to make! Simply gather plain white paper cups, a variety of craft papers, scissors, a marker, and a glue stick. From there, cut out shapes for the hat, hands, and scarf from the craft papers, then adhere them to the cups. Add some personality with markers, drawing on eyes and a bright smile. To give your snowmen an extra touch of magic, sprinkle some glitter on top.
Cupcake Liner Christmas Trees
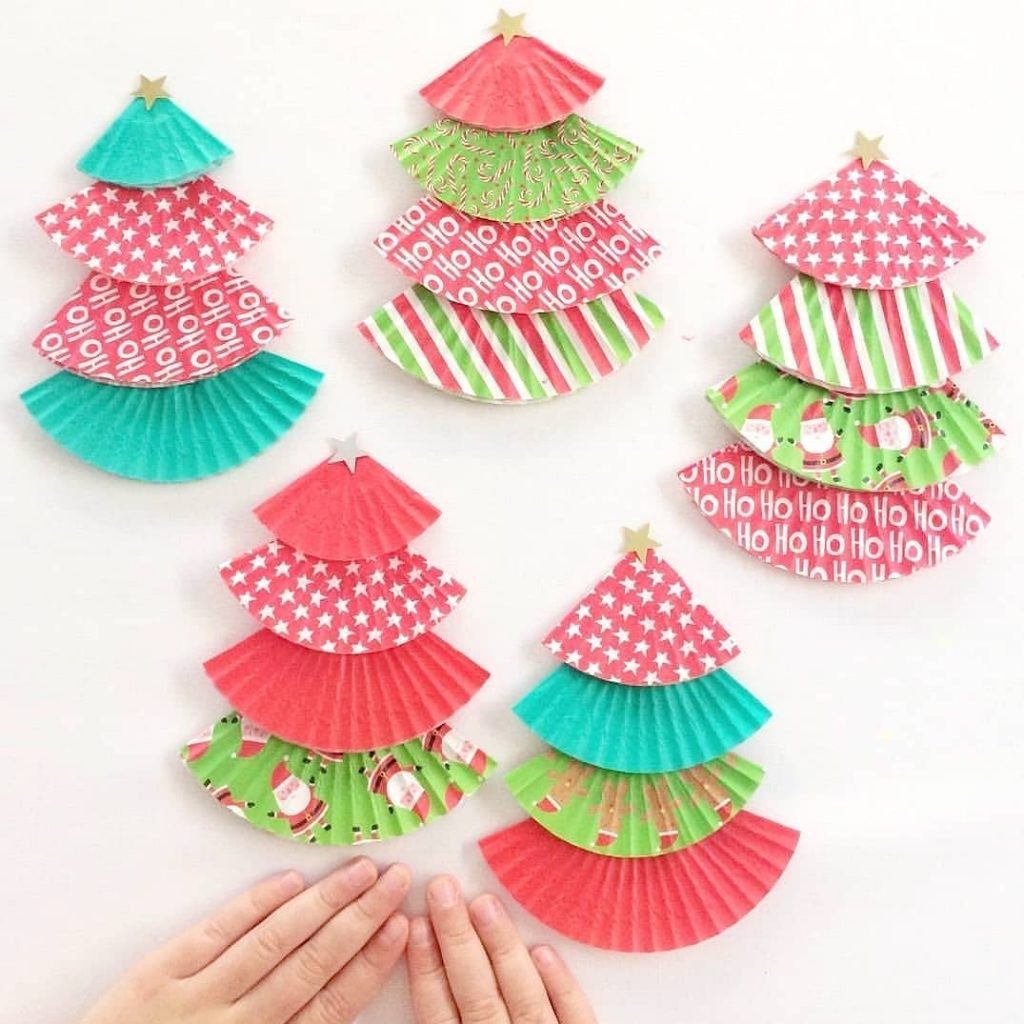
Transform your holiday season with a delightful DIY project from cintaandco! Their folded cupcake liner trees are an absolute delight to create, perfect for adorning your Christmas tree or turning into a beautiful handmade card for loved ones. To get started, gather colorful cupcake liners, some trusty glue, and any embellishments that spark joy – be it glitter, stickers, or stars. Simply fold the liners, connect them to form the tree structure, and let your creativity shine by adding personal touches. This charming project is sure to bring a smile to anyone’s face this holiday season.
DIY Animal Gift Wrapping
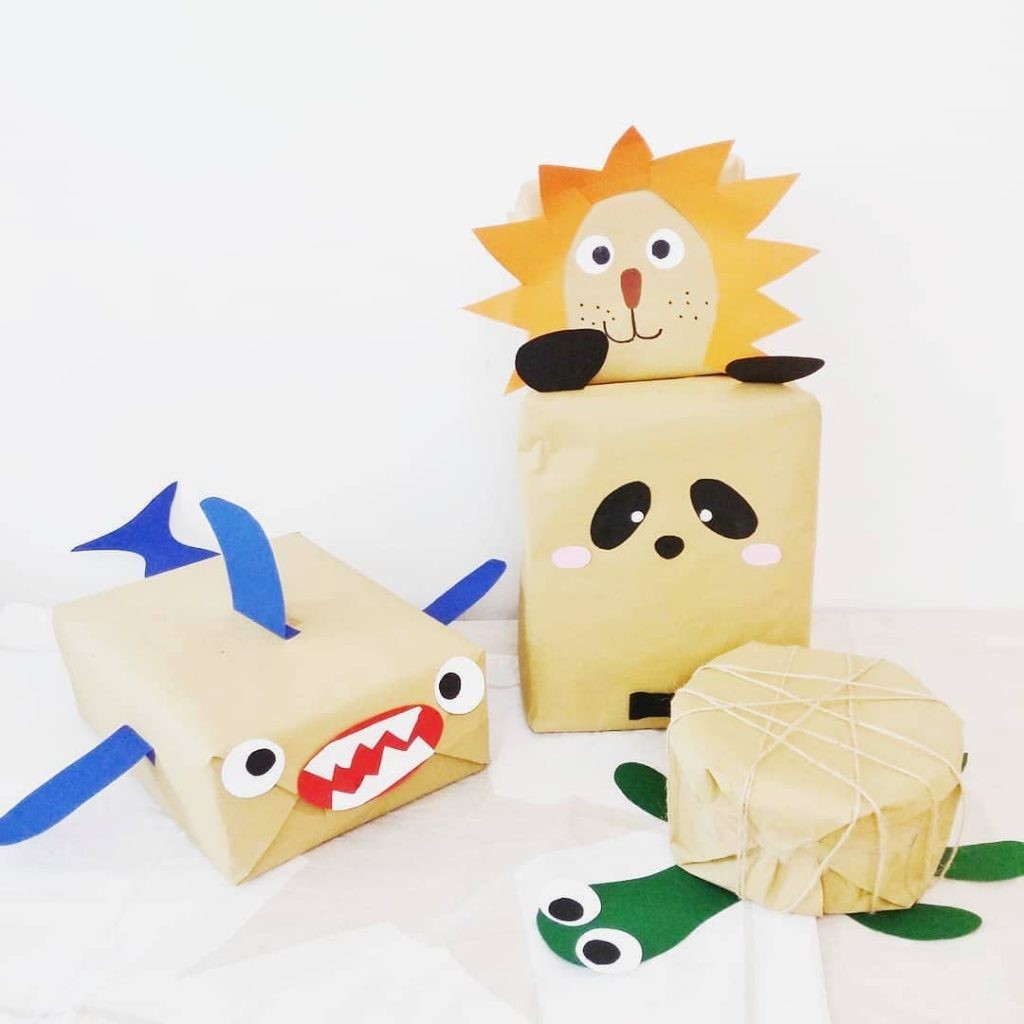
Are you stuck in a wrapping paper rut? Break free from the monotony of traditional designs by creating unique and playful animal-themed wraps. With just a few simple materials – craft papers, scissors, and sharpies – you can transform your gifts into one-of-a-kind masterpieces. Involve your kids in the process and watch them light up with excitement as they give their friends and siblings handmade presents this holiday season.
Paperplates And Yarn Santa Craft

Transforming humble paper plates into festive decorations is an activity that brings joy to both kids and adults alike! Take it up a notch by incorporating yarn and you can create this charming paper plate Santa Claus inspired by nontoygifts. This delightful decoration will be a perfect addition to your fireplace mantle or the kids’ bedroom. To bring your creative vision to life, gather the following materials: a paper plate, paint, yarn, needle, scissors, hole punch, paint sponge or brushes, markers, and red pom poms. For a comprehensive guide on how to craft this delightful decoration, visit nontoygifts’ blog for a step-by-step tutorial.
Reindeer Newspaper Craft
Transform your afternoon into a joyful Christmas craft session with this adorable newspaper reindeer project from iheartcraftythings! The best part? You can customize it using recycled newspapers or vibrant cardstock, making it an eco-friendly and creative activity for kids. To get started, gather some old newspapers, glue stick, scissors, blue cardstock, paint, and markers. Don’t forget to visit their blog for a downloadable reindeer template and a step-by-step guide on how to bring this delightful craft to life.
Colorful Christmas Tree Paperplates
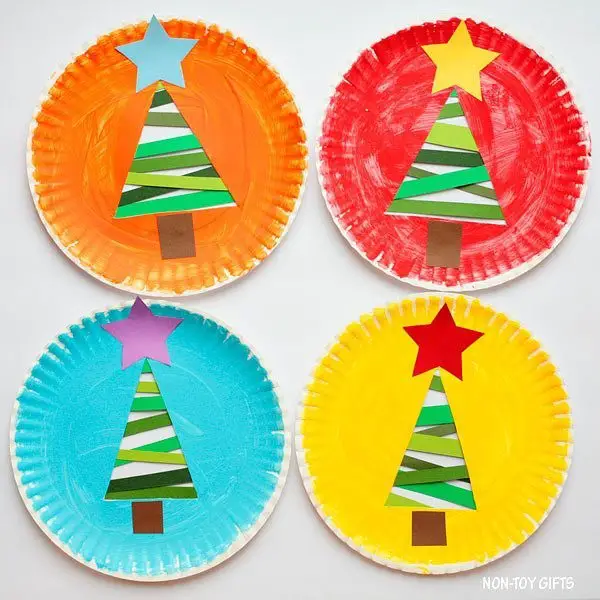
For a delightful Christmas craft activity for kids, look no further than this unique paper plate project by nontoygifts. To get started, gather your supplies: paper plates, paints, paintbrushes, pencils, scissors, green construction paper, cardstock, and glue. First, let your creativity shine by painting the plates with any color you like. Next, cut out a triangle shape from each plate – this will serve as the body of the Christmas tree. Flip the plates upside down and add some festive flair by attaching strips of green construction paper to the back using glue. To complete the look, craft a star and trunk for your tree and attach them to the plate. For a step-by-step guide and visual aids, head to nontoygifts’ website.
Paper Ball Reindeer Craft
These adorable Paper Ball Reindeer Christmas crafts from easypeasyandfun are a delightful way to get kids involved in the holiday spirit. What’s especially charming is that these paper balls can be transformed into a beautiful Christmas garland, adding a playful touch to your festive decor. To create these lovable reindeer, you’ll need just a few simple supplies: light and dark brown construction papers, scissors, glue, googly eye stickers, and red pom poms. With easy-to-follow measurements and step-by-step instructions available online, making a batch of these paper balls is a breeze. Simply string them together to create a charming Christmas garland or wall hanging that’s sure to bring joy to kids and adults alike.
DIY Pom Pom Pinecones
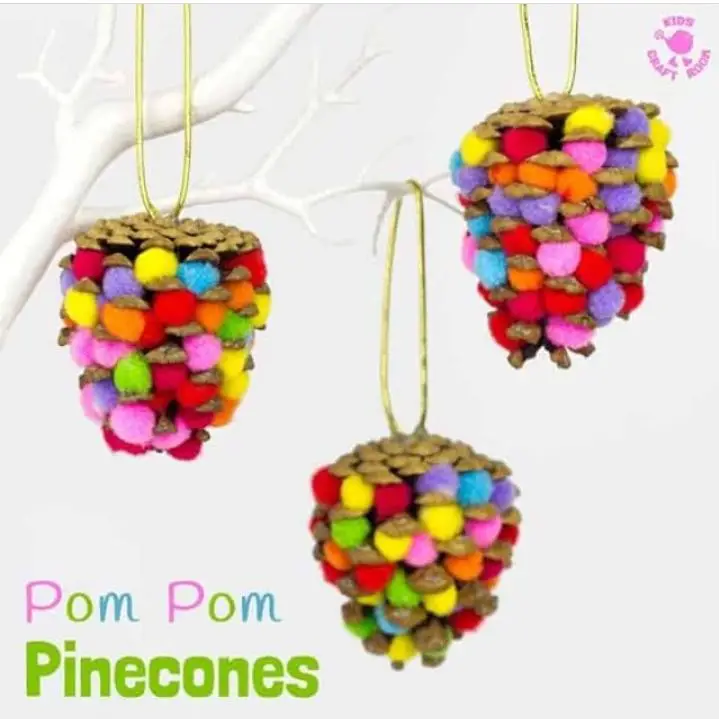
Transform your space with this delightful Pom Pom Pinecones craft, inspired by kidscraftroom for kids. This charming project can be used as Christmas ornaments or as a beautiful mobile throughout the year. The best part? It’s incredibly simple to make, requiring only a few basic supplies. To get started, gather a few pine cones, vibrant pom poms, a glue gun, and some twine to hang them up. Simply apply the pom poms between the gaps of the pine cone using your glue gun, creating a colorful and textured effect. Next, attach the twine to the top of the pine cone for a tidy finish. Voilà! This delightful craft is not only easy but also an absolute blast to create.
Pinecone Christmas Trees

Winter has finally arrived, and with it comes the perfect opportunity to get creative with decorations that exude a cozy, rustic charm. One such example is the humble pinecone, which can be transformed into adorable mini Christmas trees with just a few simple materials. To create these charming ornaments, you’ll need some pinecones, wine corks, pom poms, a hot glue gun, and paint. Start by attaching the pinecones to the wine corks using hot glue, then give the pinecones a green coat of paint. Add some extra sparkle with glitter on top, if desired. Next, use hot glue to add tiny pom poms to the gaps between the pinecone scales. Finally, cut out a glittery star and attach it to the top of the tree for a touch of whimsy.
Button Christmas Cards
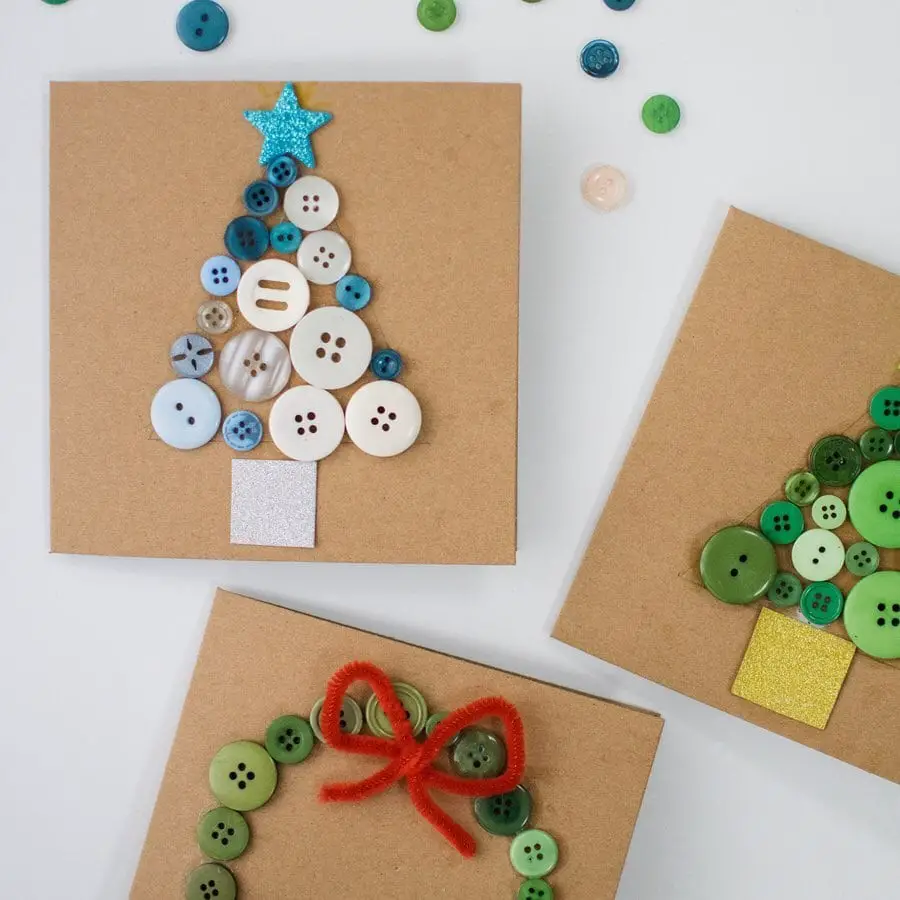
Christmas cards are an integral part of the holiday season’s charm. For many, crafting and sending these personalized greetings is a cherished tradition. One such delightful idea comes from inspiremyplay, where buttons take center stage. With just a few simple steps, you can create your own adorable button Christmas cards. Simply gather an assortment of cute buttons in various sizes and hues, then arrange them on your card to add a unique touch. Go beyond the traditional rectangular shape by forming triangles, circles, or other designs that reflect your personality. Unleash your creativity and make this holiday season even more special.
Crafty Reindeer For Kids

Get creative with your kids by making these adorable Rudolph pendants inspired by montagskonfetti. You’ll need some circular cardboard pieces, bottle caps, popsicle sticks, twine, paint, markers, and googly eyes. Start by decorating the cardboard circle with paint, then punch a hole at the top and secure it with twine. Add some personality to your reindeer by attaching the bottle caps for the nose, popsicle sticks for the antlers, and googly eyes for the eyes. Finally, use markers to draw a wide smile on Rudolph’s face. With these easy-to-make pendants, you’ll be spreading joy and cheer this holiday season.
Upcycled Snowman Crafts
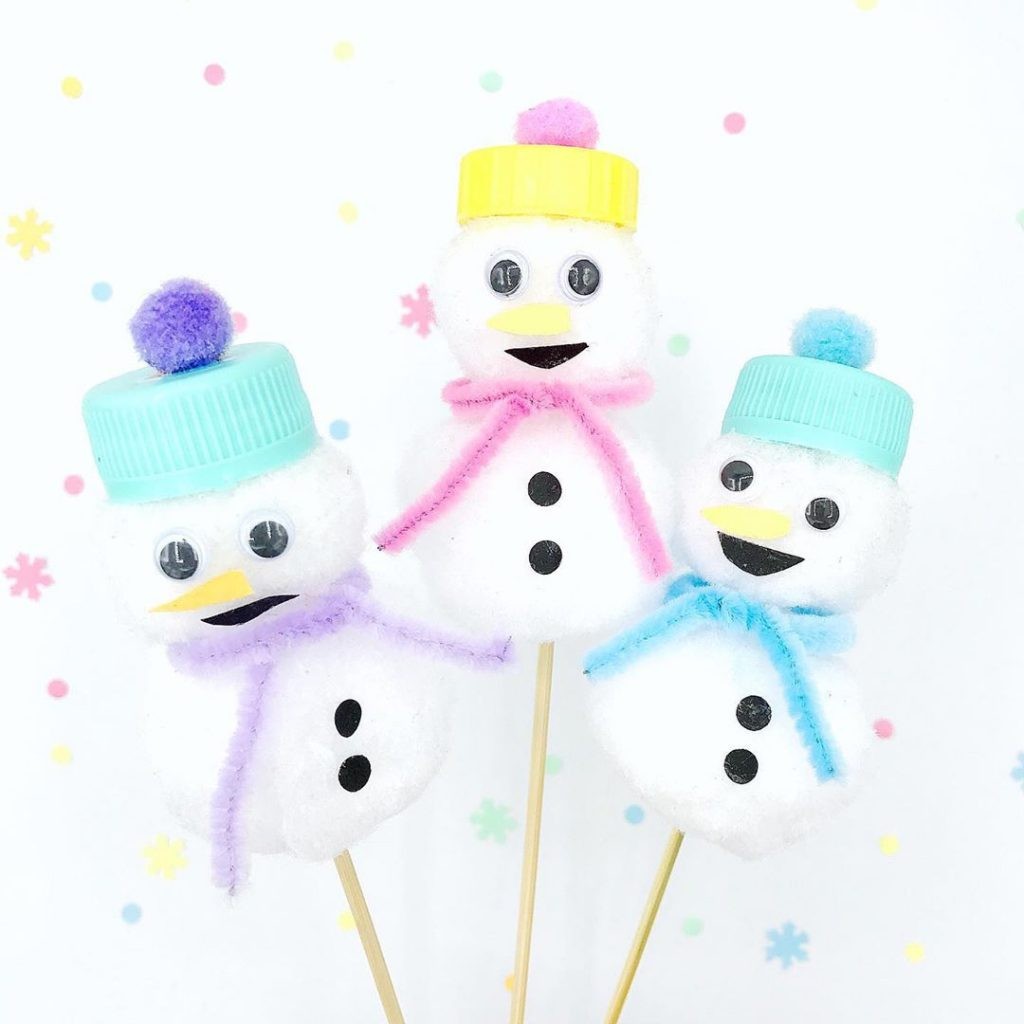
Create your own adorable snowmen using upcycled materials with this clever DIY project. Start by combining two large white pom poms on top of each other using a wooden skewer, creating the base of your snowman. Next, add a touch of elegance with a bottle cap hat, secured to the top of the pom poms and featuring a smaller colored pom pom as the finishing touch. Add some cozy flair with colorful pipe cleaners wrapped around the snowman’s body like a scarf. Finally, bring your snowman to life with googly eyes and add some personality with buttons and a smile crafted from black construction paper.
Glittery Popsicle Stick Christmas Trees
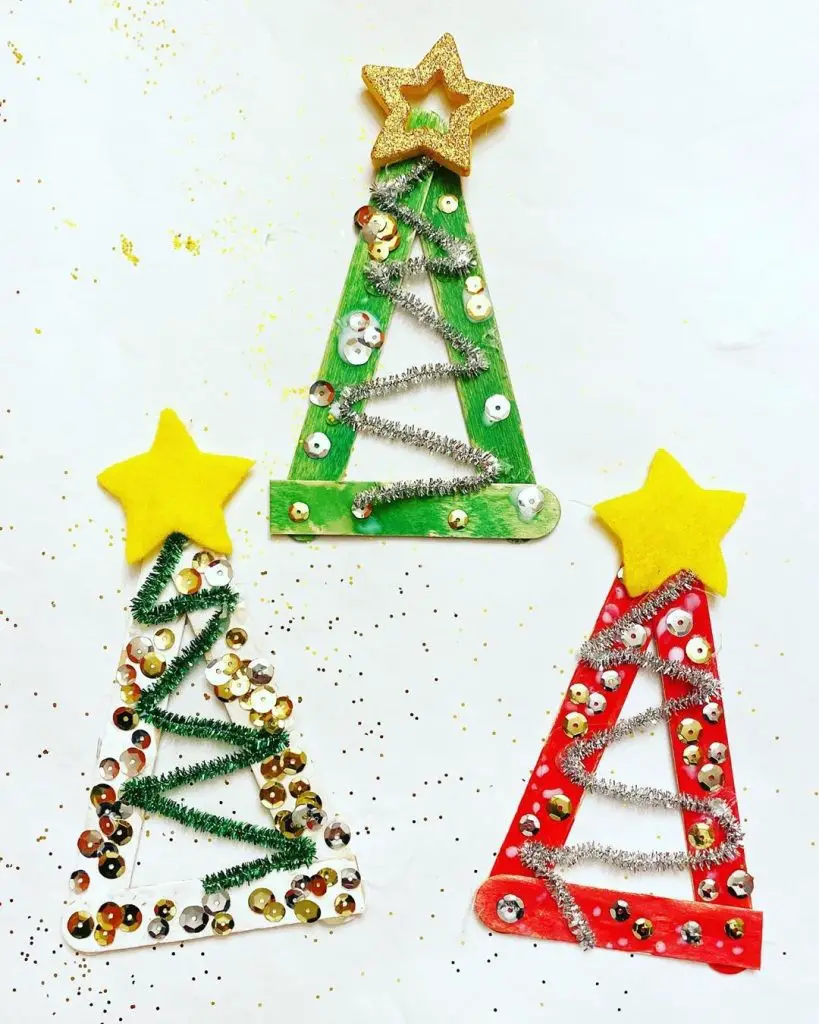
Make this Christmas season a fun and creative experience for your kids with a simple DIY project that encourages their imagination and self-expression. All you need are some basic materials like popsicle sticks, glue, felt or paper stars, pipe cleaners, and paint. By providing these supplies and letting your little ones take the lead, they’ll have a blast decorating their own mini Christmas trees. Let them add some sparkle with glitter, sequins, or other tiny trinkets you have lying around. Not only will this activity be a great way to spend quality time together, but it also yields adorable ornaments that can double as magnets or gift toppers. Just remember to let your kids’ creativity shine through and don’t worry too much about the outcome – after all, it’s the thought that counts!
Colorful Christmas Tree Crafts
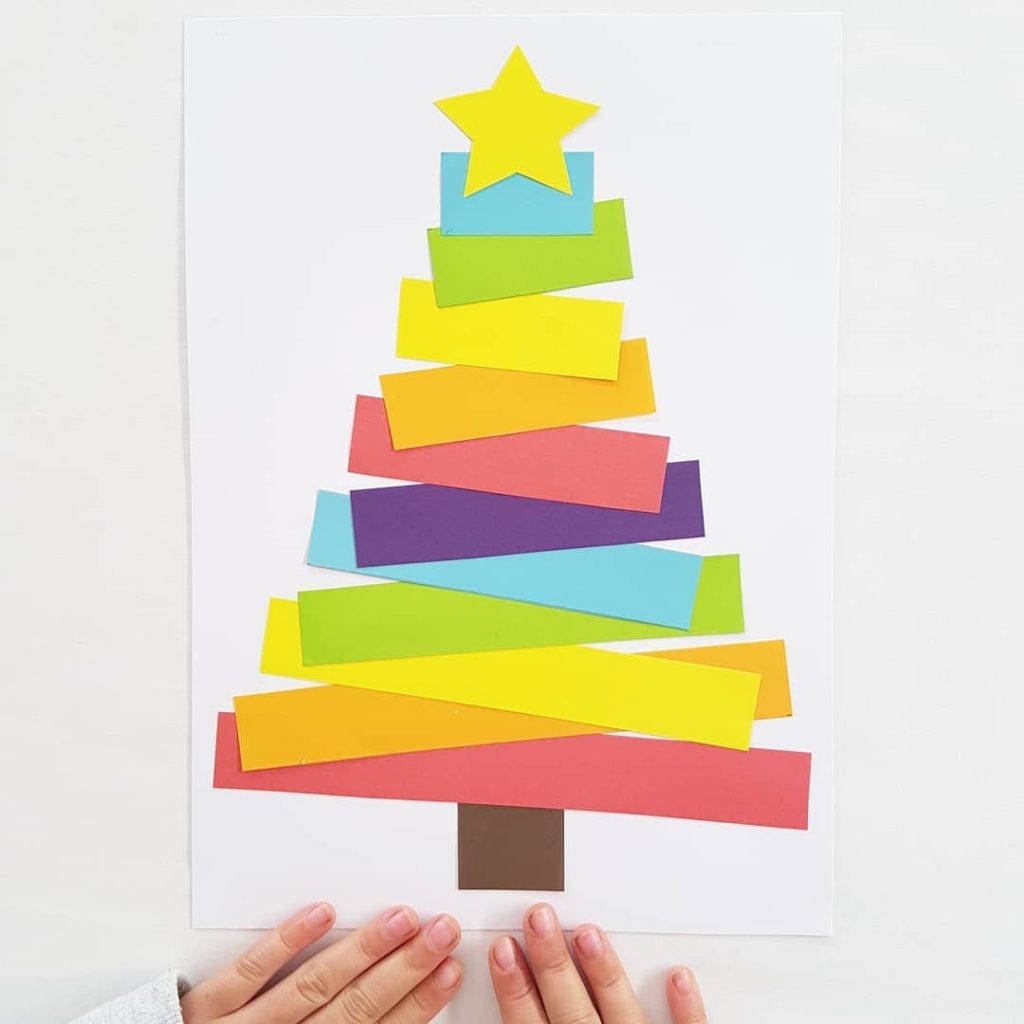
Embrace your inner crafter this holiday season by creating a charming DIY Christmas tree with minimal materials. Inspired by cintaandco, this project is perfect for a fun and festive activity with the family. Gather a few essential supplies – plain paper, colorful craft papers, scissors, and a glue stick – and let your creativity shine. Start by cutting the craft paper into varying rectangle sizes and stack them to form the tree’s silhouette. Once you’ve achieved the desired shape, secure the layers together with a dollop of glue. Add a sparkling star to the top, then encourage your little ones to write heartfelt messages inside for an extra-special touch. This project is a great way to get kids involved in the holiday spirit, allowing them to craft unique cards and share their love with friends.
Washi Tape Christmas Trees
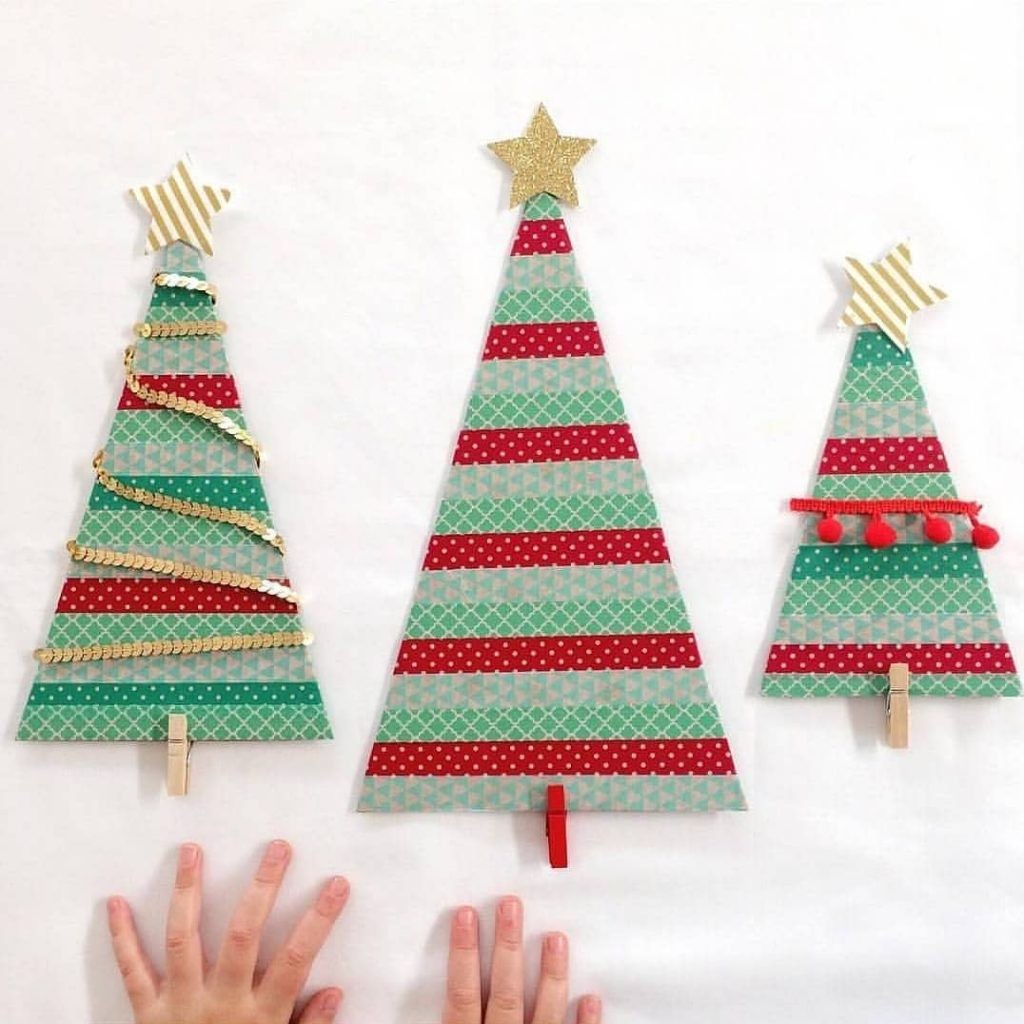
If you’re as enthusiastic about washi tape ideas as I am, then you’ll surely delight in crafting these adorable Christmas trees inspired by cintaandco’s creative endeavors. To replicate this charming project, simply gather a few essential materials: washi tape, a triangular piece of cardboard, wooden pegs, and any decorative elements that strike your fancy. Begin by cutting the cardboard into a triangle shape and then wrap it with washi tape to give it a festive flair. Use the wooden pegs to create a sturdy trunk, topping it off with a shiny star for a touch of whimsy. Finally, let your creativity shine by adorning your mini tree with sequences, pom poms, and stars – the possibilities are endless!
DIY Christmas Paper Lights
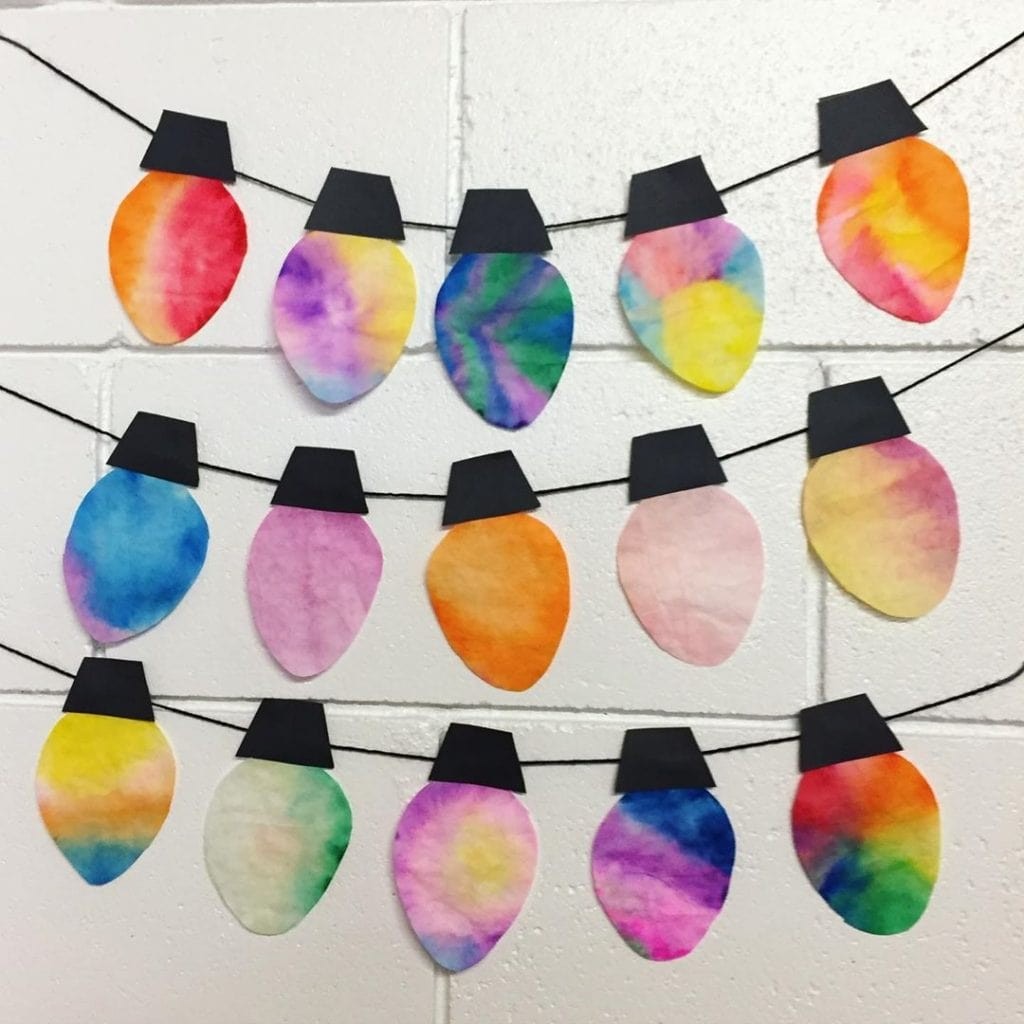
I’m utterly captivated by the enchanting Christmas lights from alisonsmagicalcrafts. Crafting these illuminations is a delightful experience that allows you to hang them on walls or windows. To create this festive magic, you’ll need diffusing paper and washable markers. Begin by coloring the diffusing paper with vibrant hues using the markers, followed by placing a sheet of plain paper underneath. Next, gently brush the layered papers with water, reveling in the mesmerizing process as colors blend and bleed. Allow them to dry before cutting out the Christmas lights shapes. Finally, secure the creations using twine, and voilà! You’ll be left with a whimsical display that’s sure to spread holiday cheer.
Cardboard House Advent Calendar
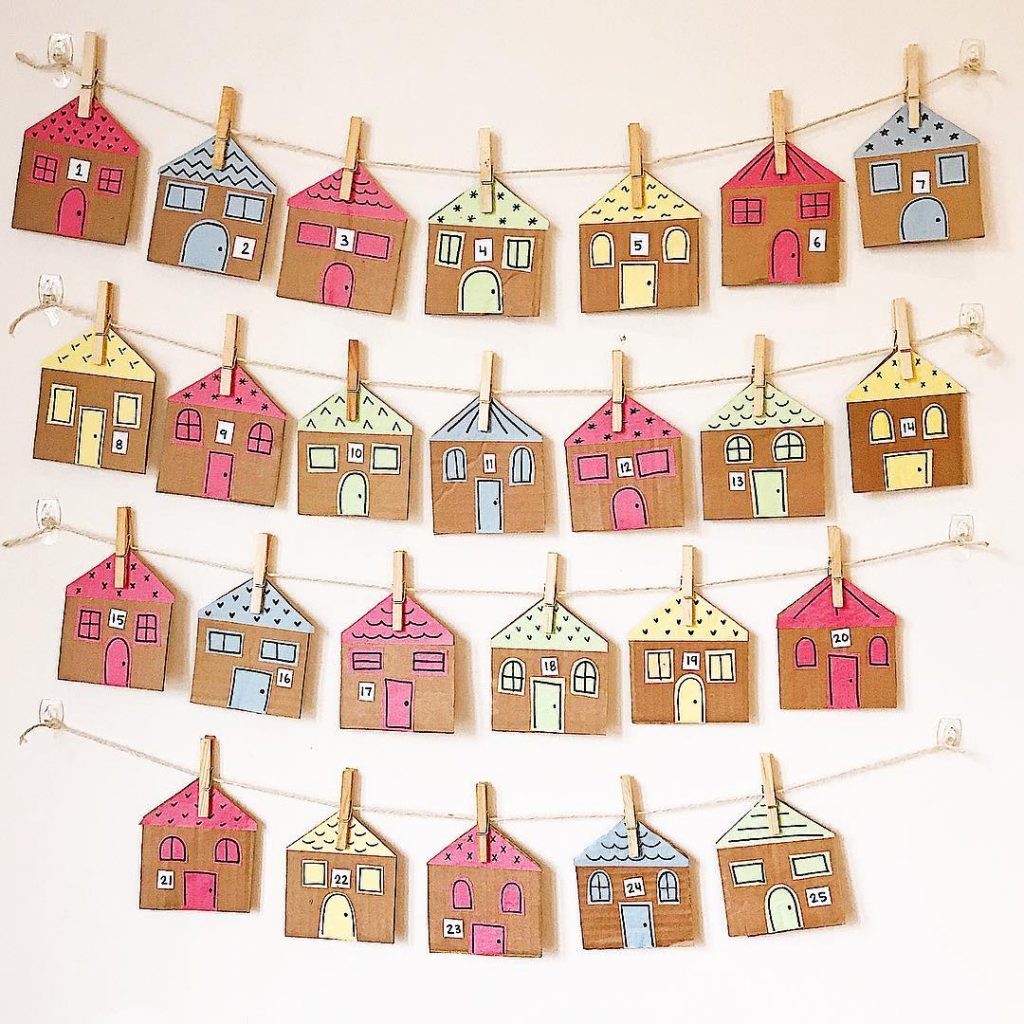
Create a festive countdown to Christmas with these colorful cardboard houses from learncraftgrow. To make this advent calendar, gather cardboard, colored construction paper, white paper, scissors, glue stick, and a black marker. Begin by cutting out a house shape from the cardboard. Use this as a stencil to trace additional houses, creating a series of identical structures. Next, draw roofs, windows, and doors on the colored construction paper using the black marker. Cut these out and attach them to each house with glue. Write numbers 1-25 on white paper, cut them out, and adhere each number to a corresponding house. For an added touch, include a note behind each house that prompts kids to perform an act of kindness daily. This thoughtful twist makes the countdown even more meaningful. With this project, you’ll be encouraging quality time with your little ones while having fun crafting together.